GPOS - Offline POS setup for EPRNext ( Part-3 - Setting on Cashier machine ( Windows setup )
Part-1 - General setting on ERPNext for GPos company-wise Part-2 - Configuration on the ERPNext server for each branch (This) Part-3 - Setting on Cashier machine ( Windows setup ) Part-4 Troubleshoo
GPOS is ERPGulf’s powerful offline Point of Sale (POS) application, developed specifically for Saudi Arabian retailers. It is fully compliant with ZATCA Phase 2 e-invoicing regulations and is seamlessly integrated with ERPNext. Designed for Windows-based systems, GPOS enables retail operations to continue smoothly even without internet connectivity, ensuring uninterrupted billing, inventory tracking, and compliance.
Installation
Prerequisite Software
Before installing GPOS, ensure the following software is installed on your Windows 11 (or later) system:
1. Microsoft SQL Server Express 2019
2. SQL Server Management Studio (SSMS)
Install the software :
1-Download the GPOS Offline sofware from the provided link ( Will be shared on request )
2- Extract the download software , and open the extracted folder
3- Edit settings.json file inside the above folder
o DefaultConnection: Update the MS SQL Server name if known. You can open SQL Server Management Studio, and see the server name on object explorer.
o HOST_NAME T(he host name shared by ERPGulf. Update this as provided..)
o API_KEY: Provided by ERPGulf. Do not modify unless instructed.
o API_SECRET: Provided by ERPGulf. Keep this confidential.
o APP_KEY: Provided by ERPGulf. Required for application validation.
o CLIENT_SECRET: Provided by ERPGulf. Required for secure communication.
o MACHINE_NAME: Provided by ERPGulf. Must match the registered POS machine name.
o INVOICE_PREFIX: Your Custom prefix for your invoice numbers. Example: ERG results in invoice ERG00001.
o BRANCH_ID: The POS Profile ID created in ERP. See Image 1.0 for reference.
4- Create POSApplication.exe shortcut to desktop
5-Run the POS application as usual.
6- Once launched, please wait until the user list is fully synced from the server.
7-Do not attempt to log in or use the POS until the sync is complete.
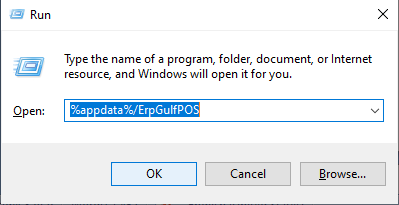
8-Ensure that the following two files are created in the AppData folder. ( To access the folder: Press Windows + R , Type: %appdata%\ErpGulfPOS and press Enter)
a-Invoice.json
b- AppSettings.json
refer below image .

Cloud Support
We support cloud related issues at Claudion.com
No comments yet. Login to start a new discussion Start a new discussion