ZATCA Advance Invoice
- Create Sales Order
- Start by creating a Sales Order in ERPNext.
- Enter all required details including items, quantities, prices, and payment schedules.
- Submit the Sales Order.
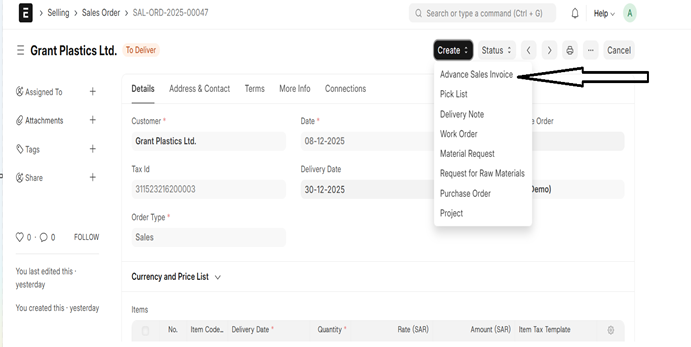
- Create Advance Sales Invoice
- After submitting the Sales Order, click the Create button inside the Sales Order.
- Select Create Advanced Sales Invoice (a custom Doctype created specifically for advance billing).
- In the Advance Sales Invoice, choose:
- ZATCA Tax Category
- Exemption Reason Code
- ZATCA Discount Reason Code
- ZATCA Discount Reason
- Fill in the Item Table and Tax Table accordingly.
- Submit the Advance Sales Invoice.
- On submission, the invoice is sent to ZATCA.
- If successful:
- QR Code will be automatically generated and attached.
- XML file will be generated and attached.
- ZATCA response details like UUID and Reporting Status will be updated in the document.
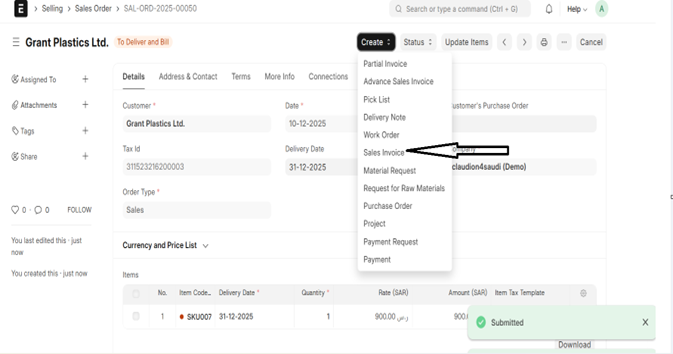
- Create Final Sales Invoice
- Go back to the same Sales Order that was originally created.
- Click Create → Sales Invoice.
- Enter all the required details for a normal Sales Invoice that needs to be submitted to ZATCA.
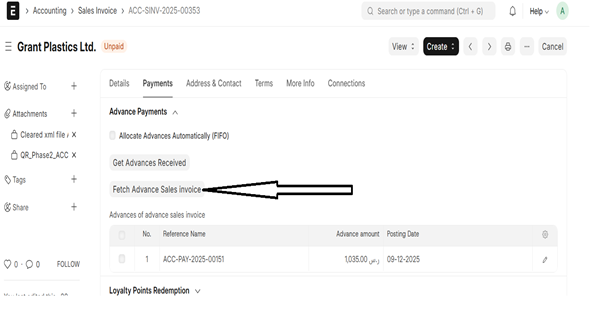
- Fetch Advance Sales Invoice
- The system will automatically:
- Fetch the previously submitted Advance Sales Invoice
- Update advance amount, invoice number, UUID, and remaining payable amounts automatically.
- Submit Final Sales Invoice to ZATCA
- After updating all values, Submit the Sales Invoice.
- The system sends the final invoice XML to ZATCA.
- When ZATCA returns a successful response:
- The QR code and XML are attached to the Sales Invoice.
- Inside the XML, under Invoice Line and Prepaid Amount section, details of the Advance Sales Invoice are included:
- Advance Invoice Number
- UUID
- Invoice Date
- Adjusted Amount
In the Payments Table, under Advance Payments section, click: