Setting up the Cashier Machine (Windows Setup)
GPOS (Gulf POS) is ERPGulf’s robust offline Point of Sale application, built specifically for Saudi Arabian retailers and fully ZATCA Phase 2 e-invoicing compliant. It seamlessly integrates with ERPNext while allowing retail operations to function without internet connectivity. This ensures uninterrupted billing, real-time inventory tracking, and compliance with local regulations.
This section explains how to install and configure GPOS on a Windows-based cashier machine.
Prerequisite Software
Before proceeding, ensure that the following software is installed on your Windows 11 (or later) system:
- Microsoft SQL Server Express 2019 – Required for database storage.
- SQL Server Management Studio (SSMS) – For managing the SQL database.
Tip: Install both applications before starting GPOS installation to avoid configuration errors.
Installation of GPOS Software
- Download the GPOS Offline Software
- Request the official download link from ERPGulf.
- Extract the Downloaded File
- Right-click → “Extract All” into a folder on your desktop for easy access.
- Edit the settings.json File
- Edit the settings.json File Inside the extracted GPOS folder, locate and open settings.json with Notepad or another text editor. Update the following fields as per the information provided by ERPGulf:
| Field | Description |
|---|---|
| DefaultConnection | Enter your MS SQL Server name. Check this in SSMS → Object Explorer. |
| HOST_NAME | Provided by ERPGulf (branch/instance identifier). |
| API_KEY | Provided by ERPGulf – do not modify unless instructed. |
| API_SECRET | Provided by ERPGulf – keep confidential. |
| APP_KEY | Application validation key (provided). |
| CLIENT_SECRET | For secure communication between GPOS & ERPNext. |
| MACHINE_NAME | Must match the registered POS machine name in ERPNext. |
| INVOICE_PREFIX | Custom prefix for invoice numbers (e.g., ERG → ERG00001). |
| BRANCH_ID | POS Profile ID from ERPNext. |
First-Time Application Launch
- Run the POS Application
- Double-click the shortcut to open the POS.
- Wait for User Data Sync
- On first launch, the application will sync the user list from the ERPNext server.
- Do not log in until the sync process completes.
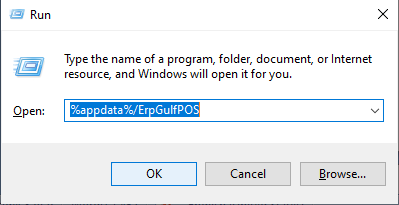
- Check AppData Folder for Configuration Files
- Press Windows + R, type:
- Ensure these files are present:
- Invoice.json
- AppSettings.json
%appdata%\ErpGulfPOS
and press Enter.

Note: If these files are missing, recheck the settings.json configuration or contact ERPGulf support.
Recommended System Settings for Smooth Operation
- Run as Administrator: Always open GPOS with admin rights to avoid permission issues.
- Stable Local Network: Even though GPOS works offline, a stable LAN connection is recommended for branch sync.
- Time & Date Sync: Ensure the cashier machine has the correct date/time to avoid invoice timestamp errors.
- Automatic Startup (Optional): Add POSApplication.exe to Windows Startup for quick access at shift star